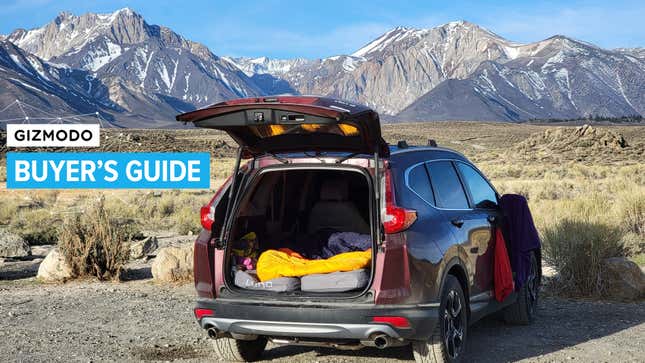
I lived in a van for five years, which is quite a long time. In fact, I lived in that thing for longer than I’ve lived in any other place since leaving my childhood home. Strangely, I found moving out of a van to be more stressful than moving into one. I was afraid I was going to miss the freedom that comes with having everything travel-ready in my own little turtle shell. The moment I got a normal-person car, I got to work figuring out how to be able to use it as a mini camper-van.
Now, we’re not talking about doing a full, permanent conversion here. I was moving to LA, and my car’s primary duty would be getting me around the city. But I wanted to develop a system that would make it killer for road trips and backcountry camping—a vehicle that, like my van, I could just park, pull up my shades, and go to sleep. In fact, I was hoping that it would be able to take me places my van couldn’t get to. It turns out there are many products out there for that exact purpose. There’s a ton to choose from, so I went deep down the research rabbit hole and have been testing gear.
If you want to hit the road this summer, I have some rock-solid recommendations for you, and a few tips and tricks along the way, too.
The Gear You Need for Your Car
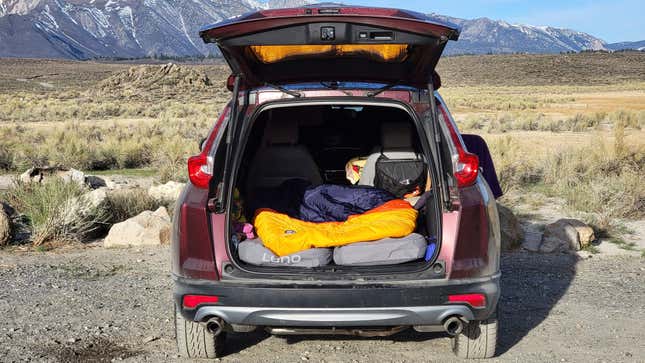
You do not need to run out and get a new car for this. It’s entirely possible that the car you already own will work pretty well for this purpose. The one big thing you’re going to want is back seats that fold down as flat as possible, because that’s going to be your bed. Aside from that, more space generally means more comfort, but really the most important question is: What kind of camping do you want to do? Breaking that down a little, you need to think about the places you want to be able to go, and the type of climate and roads you’re likely to encounter.
For me, I knew that I wanted to be able to do some winter camping, ideally near ski resorts, so I had to have something with all-wheel drive. I wanted to be able to get out on dirt trails, but because it’s my day-in-day out car I didn’t want something that’s difficult to park in cities, or that was super lifted or with gigantic tires that would kill my MPG. I went with a Honda CR-V. It checked all of my boxes. I wouldn’t be able to go rock-crawling on the Rubicon Trail or anything, but it has all-wheel drive so it should pretty well cover me for most of the dirt roads I want to take on. Critically, the back seat folds down extremely flat. For most people looking for a normal car that can also double as a camper I recommend something in this crossover (i.e. something between a sedan and SUV) category. In addition to the Honda CR-V, that would include vehicles like the Subaru Outback, Toyota RAV4, Mazda CX-5, Tesla Model X, and others of that ilk.
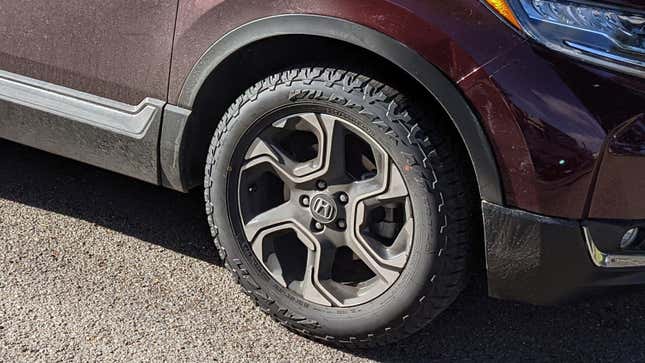
Tires: Falken Wildpeak A/T Trail ($175/ea)
Did you get a crossover? Cool. Now take the tires off of it and make them into swings or something, because I can pretty much guarantee you that the tires that came stock with your car suck. Well, they might be fine for dry highways, but if you’re wanting to try them on dirty or snowy roads then you’re really going to need something better. A lot of people will simply slap some all-terrain tires that are designed for pickup trucks onto their crossovers and call it good, but there may be a steep price for doing that. Crossovers aren’t designed for wheels that heavy, and putting them on may cause some serious strain and potentially do major damage. Also, pickup trucks and larger SUVs are constructed in two pieces: a body on top of a frame. Crossovers are a unibody design, more like a standard sedan, just with more capacity and a higher center of gravity. As a result, crossovers handle quite differently, and really should have a tire designed for their unique characteristics.
This is why the first thing I got for my CR-V was a set of Falken Wildpeak A/T Trail tires. They are, as far as I know, the first and only all-terrain tire built specifically for crossovers. Somehow, they do everything really well. They’re lightweight for a crossover’s drivetrain, and you get solid fuel economy on the highway, but they are USTMA-rated for Severe Snow and perform almost as well as a dedicated snow-tire. This winter I drove on some very steep, very icy roads in Yosemite and the Angeles National Forest. Pickup trucks with 4WD were pulling over to put chains on, and others were spinning tires and fishtailing badly. My car acted like it was glued down and didn’t slip once. It was truly impressive.
If you do have a larger vehicle that can take heavier tires, I’ve had good luck in the past with BF Goodrich All-Terrain K02 tires. They have excellent grip for off-road but are surprisingly quiet on the highway. These are what I ran on the Sprinter van I lived in (which took light truck tires), and they got me out of more than one pickle on bad roads.
Chains: Security Chain Super Z6 (price varies, but $90 for two)
Some winter roads require you to at least carry snow chains on your vehicle. If you are stopped and don’t have them, you’re looking at a steep ticket at the very least and will likely be turned back. Because I got the aforementioned Falken tires, I didn’t actually have to use my chains at all this winter, but I did pass through several checkpoints with rangers ensuring that I had them. I went with the Super Z6 tire cables. They are much, muuuch easier to install than traditional chains. You don’t have to move your car midway through, thanks to the bungee like system. They’re also a lot quieter while driving. If you have an AWD or 4WD car, make sure you have a chain for all four tires, and make sure you’ve practiced installing and removing them before you head out (YouTube is your friend) so you aren’t learning while you’re freezing on the side of a dangerous road. Also, make sure you get the right size for your specific tires.
The Gear You Need to Go to Sleep
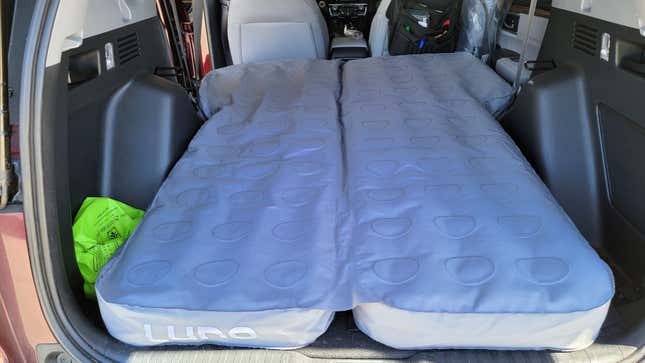
Mattress: Luno Air Mattress 2.0 ($330)
Cars, crossovers, and SUVs were not generally designed with sleep comfort in mind. Coming from a van with a full-sized memory foam mattress, I suspected this would be the toughest adjustment for me, and I was correct. Air will just never be as comfortable as foam. That being said, I did find an air mattress that made the transition easier.
The Luno Air Mattress 2.0 is specifically designed for campers who want to sleep in the back of their SUV or crossover. If you spread it out on the floor it’s an odd shape, but that makes it Tetris perfectly into the back of your car when the rear seats are pushed down. It is a two-chamber mattress, so you can inflate the whole thing if there are two of you (or if you like to spread out), or you can just inflate one side if you’d rather use the rest of the space for gear. It comes with an electric pump that plugs into your car’s DC outlet, and it inflates quickly to a very cushy height of four inches.
Luno claims its mattress fits more than 1,800 models of cars. You just punch your year/make/model into the website and it’ll let you know. I found it easy to sleep on, and I was pretty toasty even when the temperature dropped below freezing. I do wish it had a bit of foil or insulation in it to reflect some body heat back to you on the coldest of nights, as I got a bit chilly when it dropped below freezing, but it was comfortable, easy to dial in my preferred amount of firmness, and it was long enough that I didn’t feel cramped (I’m 6’ 1”).
Sleeping Bag: Big Agnes Cabin Creek 15 ($290)
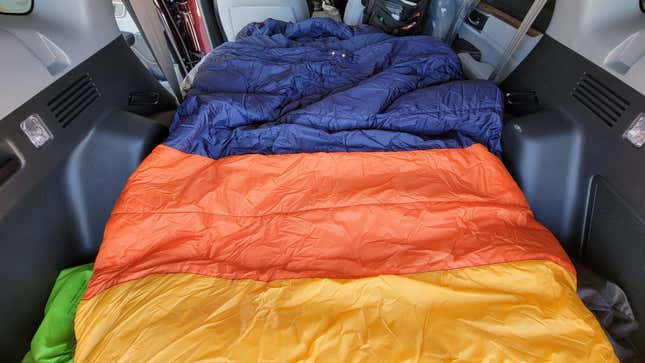
If you’ve got an air mattress built for two, you probably want a sleeping bag built for two, too. After all, trying to cuddle when you’re each in your own sleeping bag is problematic at best. The Cabin Creek worked really nicely for this setup. I was able to connect it to the Luno mattress so it didn’t slide around. The 100% recycled synthetic insulation provided a ton of soft, fluffy loft which was cozy and comfortable. Big Agnes made the choice to not insulate the under side of the bag, because that’s what the air mattress does (and neither down nor synthetic stuffing can insulate when your bodyweight compresses all of the air out of it). I actually found this resulted in the occasional cold-spot on my butt during the chilliest night (30 degrees Fahrenheit), but overall, the bag definitely lived up to its 15 degree F rating.
While I appreciated the room to spread out and toss and turn (and the excellent hood and “pillow barn”) on the Cabin Creek, if you know you’re going to be sleeping solo and warmth is more important than wiggle room, I’d probably go with something like the Nemo Sonic 0-degree bag. At $450, it isn’t cheap, but it may be the best-designed bag I’ve ever seen. It has zippable gills for temperature regulation, and it’s shaped to allow side-sleepers (like me) to curl up like we normally do.
The Gear to Keep You Powered Up
One of the things I loved most about van life was that I had all of my work gear with me. I could just plug my laptop, phone, flashlights, or cameras into the wall and charge up, and I always had enough power to keep my fridge running. That’s because in addition to the car battery under the hood, campervans typically have a “house battery” for running all that extra stuff. Obviously, crossovers don’t have house batteries, but thankfully there are some pretty elegant solutions out there.
Portable Power Station: Jackery Explorer 1500 ($1,600)
Admittedly, this was probably a bit overkill, but if I have to edit video, that can really eat through battery. Jackery’s Explorer 1500 is a portable power station, meaning it has a battery with a built-in inverter, and outlets. It has an impressive 1488Wh capacity, yet it’s compact enough that it easily tucks away in the foot area of the passenger seat. It has two USB-A ports, one USB-C, three grounded AC outlets, and one 12-volt DC car outlet. You can charge it up at home by plugging it into a wall, and you can charge while you drive by using the included car charger. I keep it charged up at home in case of emergencies, but there’s another way to juice it up on the road…
Solar Panels: Jackery SolarSaga 100W ($300)
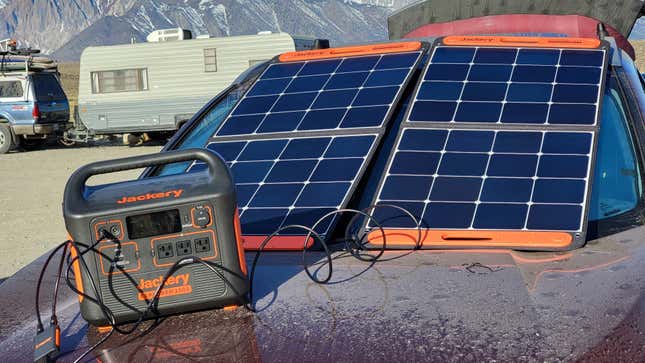
I was pleasantly surprised by how efficient these portable solar panels are. They fold in half and magnetically click shut which keeps them clean and safe in between uses, but when they open up they have a solar conversion efficiency of up to 23%, which is extremely high for a portable panel. You can daisy chain up to four of them together to refill your portable power station quickly. I threw two of these panels on top of my car and ran a cable down through a crack in the sunroof to the Explorer 1500. It went from 92% full to 100% full by the time I was finished with breakfast. Weighing 9 pounds each and measuring 24 x 21 x 1.4 inches they are a bit bulky, but at least they fold flat, so they don’t take up a ton of trunk space.
The Gear You Need for Cooking
Cooler: Dometic CFX3 35 ($900)
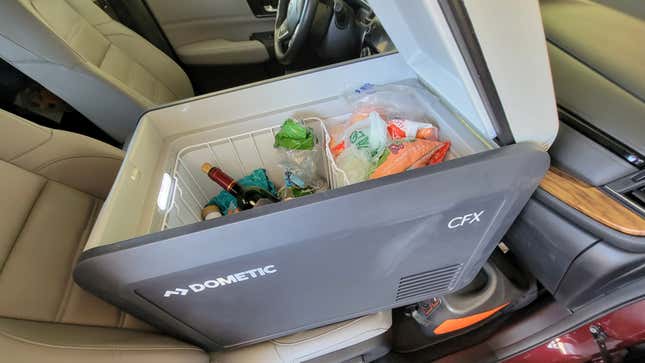
One of the major advantages of vanlife was having a fridge that I could keep full of fresh produce. Being able to eat healthily when on the road for long periods was critically important to keep me from feeling like garbage all the time, and it saves a lot of money, too. Figuring out how to tackle this in my car camper was one of my top priorities. Fortunately, there’s an incredibly straightforward solution: electric coolers. They have the same basic shape of a standard cooler you put ice into, but it’s essentially a small fridge inside.
The Dometic CFX3 line was the no-brainer way to go. Not only do they have solid capacity, but they are well-insulated and absurdly efficient. I ended up going with the 35-liter size, which fit nicely on the passenger seat of my car, allowing me to quickly grab an ice-cold drink while knocking out long miles. It plugs into the DC outlet on the above-mentioned Jackery Explorer, and even though I kept it turned down to a frosty 37 degrees F, it only drained the battery 8% over the course of eight hours. That’s pretty remarkable! Bonus: I wasn’t sure where I was going to store the cooler when not road-tripping, but it can also plug into a standard AC outlet, and it’s rather good-looking, so it serves as a mini-fridge next to my couch when in between trips.
If an electric cooler feels overly complicated, large, or expensive, then I’d recommend getting a modern roto-molded cooler. After absurd amounts of research, I went with a hard plastic cooler from Orca. They are extremely tough, they start around $200, and they can keep ice frozen for a ridiculous 10 days (under the right circumstances).
Stove: MSR Reactor 2.5L ($270)
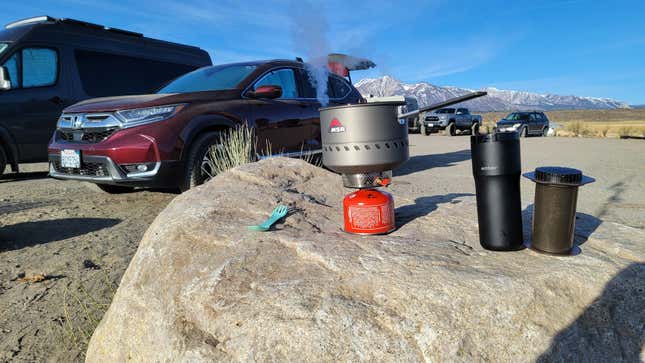
Normally I prefer a liquid fuel stove for camping, as they’re very efficient, they cut down on waste, and it’s easy to find fuel in a pinch. That said, the idea of accidentally spilling white gas inside my car sounded horrible, so I decided to go with a self-contained canister stove. The MSR Reactor was my pick.
The Reactor not only boils water absurdly fast (like, I walked away for a minute and came back to a billowing column of steam), but it’s built for melting snow in a hurry, something that has come in handy while winter camping. It also stands up against extremely high winds, and it’s compact enough that the stove and canister fit nicely within the 2.5-liter pot. The one thing I wish it had would be push-button ignition, as it can be a little tricky to get it lit when it’s windy, but otherwise it’s fantastic.
I went with the 2.5L so I could boil a bunch of pasta for a small group, but when solo camping I kept messes to a minimum by just boiling water and pouring it into a freeze-dried meal pouch, like those from Good To-Go. Extremely important note: Do not use a fuel-burning stove in any enclosed space. If weather forces you to cook inside your car make sure you have multiple windows open or you could asphyxiate.
Mug: Ember Travel Mug 2 ($180) With Car Charger ($50)
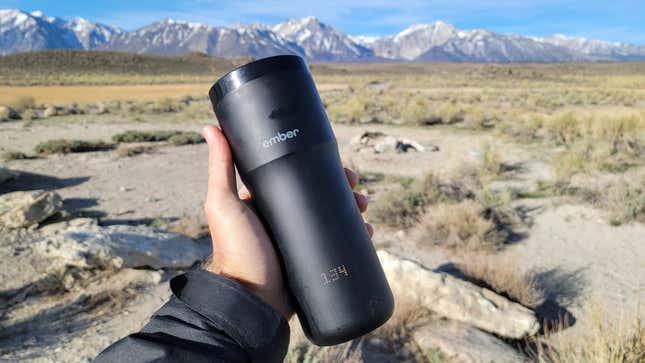
Look, this is absolutely a luxury item, but I love it unabashedly. Yes, you can just pour your coffee into a double-wall thermos-type bottle, but then it will stay lip-burningly hot for an hour. The Ember mug has a built-in battery and electric heater, so it will drop down to your favorite temperature and then keep it there. For me, that turns out to be 133 degrees F. It has a digital display that shows you what temp it’s at (and allows you to adjust on the fly), and it will keep your beverage at that temp for up to three hours. It now has a car charger that plugs into a standard DC outlet, so you can keep it powered up for even the longest drives. The top is great at eliminating spills, too. My one gripe is that the 12-ounce capacity is a bit small. Give me 16-ounces of hot bean water, please!
Sink: Sea To Summit Kitchen Sink 10L ($25)
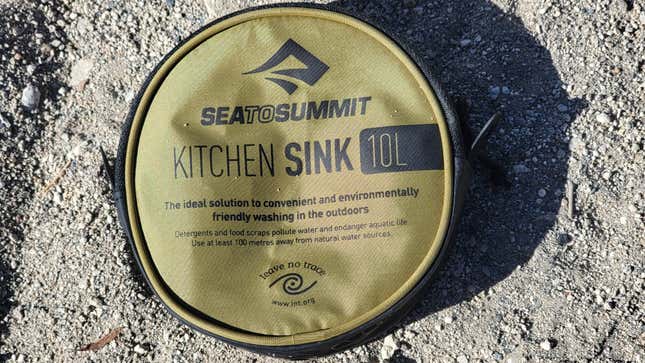
It’s really nice to have a basin to wash things in. These things might include dishes, gear, clothes, or even yourself (sponge bath-style). This thing is basically a basket that folds up super small and tucks away, but can carry about 2.5 gallons of water. It’s a really handy thing to have—just use the gentlest, biodegradable soap and don’t dump it anywhere near running water.
Water Carrying: GSI Outdoors Folding Water Cube 20L ($10)
I think it’s always a good idea to have a few gallons of water in your car, whether you’re camping or not. Good for staying hydrated, good for emergencies, good for washing dog shit off your shoe. This cube is very simple. It’s made of a soft plastic, so it folds away when not in use, but it holds 3.9 gallons of water, is easy to carry, and it doesn’t leak. I try to keep mine full and tucked behind my driver’s seat at all times. Get multiple for longer trips, or if you’re going to be desert camping in hot, dry places.
The Gear to Keep You Safe
Car Alarm: Viper SmartStart Pro System (starting at $150)
So, look, if you’re filling your car with some fancy, expensive gear, you want to protect it. While window shades (see below) are critical, I would say that having a good alarm system is extremely important. I used the Viper SmartStart system for more than five years in my van, and it gave me a lot of peace of mind. I would arm it when I was inside sleeping in a sketchy area, and I would arm it whenever I left it, because all my worldly possessions were in there.
Viper’s system is modular, but the SmartStart Pro features GPS and two-way smartphone connectivity. If you’re 1,000 miles away and your alarm goes off, you’ll know. You can also check to make sure it’s locked, or find on a map exactly where the hell you parked. There are also options like auto-start (which is amazing for freezing days), and a highly-recommended Glass Crash Sensor (it uses a mic to listen for that telltale sound). You can also get two-way key fobs which will ring if your car alarm trips and you’re within a mile or so. Some of the advanced features like GPS and phone connectivity require an annual subscription of roughly $100, but I think it’s worth it. It’s also worth noting that installing this is not trivial and I would only have it done by a trained professional or you could really mess things up. I’m based in Los Angeles, and Viper recommended that I go to Long Beach Audio Shop for the install. They got me in and out quickly and the system has been working flawlessly. Feel free to ask for Efren and tell him Gizmodo sent you.
Shades: WeatherTech SunShade Full Vehicle Kit ($140, but varies by vehicle)
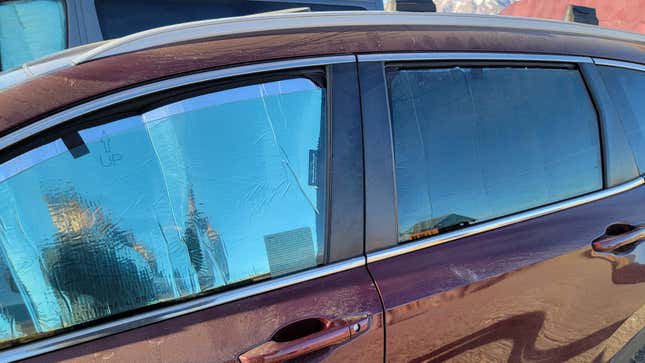
The No. 1 most important thing you can do for your safety when sleeping in your vehicle is to not be seen. For that reason, I think blackout shades are a critical upgrade. I know a lot of people make their own out of felt and Velcro, but I just went ahead a bought a full vehicle kit from WeatherTech. You punch in your year/make/model, and they’ll send you a blackout shade for every window in your car (eight separate panels for my CR-V). There’s a black side and a reflective side, depending on what temperatures you’re dealing with, but either way, you just pop them into place, and they stay put. You can still crack windows even with them in, and they’ll keep people from seeing who (if anybody) is inside, which is mandatory for urban boondocking.
Bug Screens: Rear Windows ($13) and Moonroof ($17)
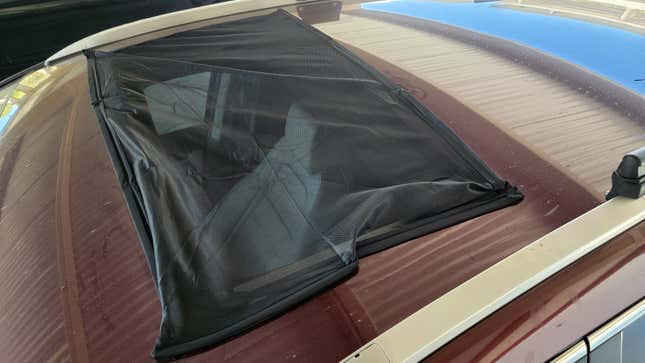
There is a rule about sleeping in your car that you must know: You have to crack a window. Ideally multiple windows. Your breath will form condensation and by morning it will look like it rained inside your car. If it’s freezing outside, that may translate to windows that are iced on the inside. Do that more than a few times and you will have a very unpleasant-smelling vehicle. At the same time, you do not want mosquitos and other bugs getting in. So, I bought these cheap screens off Amazon. Have I ever heard of these brands? I have not! But they had the best reviews in their category, and they did the job required of them. The rear window screens simply slip over the top of your door like weird, porous condoms. The moonroof screen attaches magnetically, and still allowed for a cable to run from my solar panels down into the battery in my car.
The Gear You Need for Extra Storage
Roof Rack: Yakima SkyLine System (approx. $500)
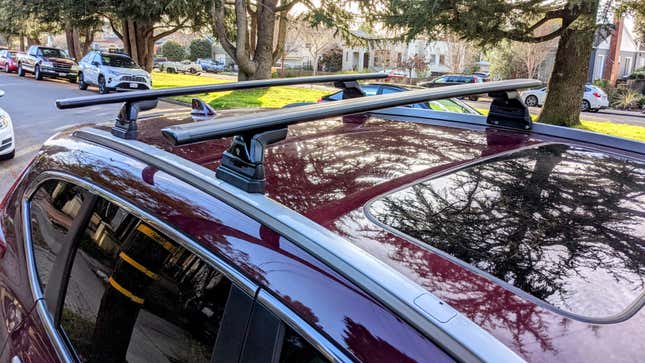
I think crossovers are a great size for this kind of camping, but they do have limitations. For one person, I was able to camp with all of my gear plus a couple snowboards and all of that equipment with no problem, but if it had been two people, it would have been a bit tight. Having some kind of external storage can be fantastic for keeping the inside of your car more livable. I ended up getting the Yakima SkyLine system with JetStream bars, which are low profile, basically silent on the highway, but great for carrying large items like surfboards.
But what I reeeally wanted was Yakima’s new Exo System. This is a rear-mounted dual-shelf system. It swings out so you still have full access to your trunk, and because everything is stored behind your car instead of on top of it, it’s easier to reach and it doesn’t hurt your MPG nearly as much. I was going to get it with a basket and lockable Gearlocker, which would have provided a ton of extra storage. Unfortunately, when it arrived I discovered that it required a 2-inch hitch, and my car only had a 1.25-inch hitch. Yakima said it wouldn’t work with an adapter either, and it was going to cost about $1,500 to get a new hitch installed, so I just sent it back, heartbroken. It looks like a great system, just make sure your vehicle is compatible.
The Miscellaneous Gear You Need
Headlamp: BioLite Headlamp 200 ($45)
This headlamp is extremely lightweight, compact, and comfortable to wear. With one-button operation, it’s very easy to use, provides more than enough light for the inside of your car (and some night walks), and has a red-light mode so you don’t wreck your night vision. Best of all, it’s USB rechargeable, so I just plugged it into my Jackery Explorer in the morning and I’ve never had issues with running out of juice.
Seat Organizer: Lusso Gear ($25)
Minimizing clutter is key for living in small spaces, so I got a seat-back organizer for all of my toiletries. It gave me easy access to my toothpaste, toothbrush, shaving kit, extra toilet paper and trowel, headlamp, bug spray, and lantern, and I could tuck my phone into it while I slept. Plus, I didn’t have to sacrifice any of the space on my bed.
Sporks: humangear GoBites Uno Sporks ($6 for two)

Look, they’re just sporks. It’s not rocket science. You need something to eat with. Get some sporks.
Of course, there’s plenty of other stuff to consider, but these are the basics and they should get you on the road. We’ll update this article as I further refine my kit and test other gadgets. If you have some gear you particularly love for road tripping, sound off in the comments.